People take photographs of koi for many reasons but are often disappointed with the results. This is not suprising as koi are notoriously difficult to photograph well but with some of the tips here you should be able to improve your chances. Most koi photographs can be put into two catergories;
- Koi portraits, taken to record the best view of the attributes of a particular koi - These are mainly taken when selling koi (similar to the photos you take when selling a car) or they are taken at shows for judging purposes and used in magazines. These are the glamour shots in the koi world and are usually taken by professionals.
- General pond pics and artistic shots, This group includes the most common photos we take of koi in a group in a pond and often are action shots.
There are lots of ways you can take photos of koi with underwater cameras, through windows in ponds and aquariums but fish photography is a wide field and can require specialist equipment so I will concentrate today on the most common method of photographing koi from above.
Equipment
Like all good photography the choice of cameras and equipment is important but they aren't the only thing involved for achieving the results you want. Technique is probably most important when photograp hing koi but having the right camera can help. SLR's have more choice of add-ons and give you the greatest level of control but increasingly people are using compact digital cameras for which you need to be aware of their weaknesses. Most modern digital cameras have a range of settings that many people don't use, but if you familiarize yourself with them they can benefit your koi photos enormously.
Surface Glare/ Polarizing Lenses
This is the biggest headache when photographing any fish from above and ruins most shots with a bright reflection or underexposure. Polarizing lenses can be a great help but camera angle and position is also important. If possible a little shading helps and not facing the sun but also try to avoid casting a shadow. To eliminate glare some professionals try to shoot indoors or at night but I think this can cast shadows that look unnatural.
Fitting polarizing lenses to SLR's is not a problem as they just thread onto most lenses but it's not always so easy for compact cameras. Polarizing filters are relatively cheap so if you cannot get one to fit you could hold one over the lens or a better method is to custom fit one yourself. I have found that a 35mm film case fits my IXUS zoom lens snuggly when chopped in half and can take some of the smaller Nikon polarizers available.
Focus
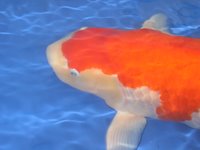
A camera can be automatic or manual focus but when automatic if possible set it so the target point is in focus because reflections on the water can play tricks with some cameras. Automatic or manual it is critical to hold the camera steady while squeezing the shutter release. Autofocus systems can work very well most of the time but when close up on the curved surface of a brightly coloured koi they can become totally confused and produce a fuzzy picture. To avoid this when taking a koi portrait aim the camera at the lead edge of the dorsal fin or an eye as these give the contrast needed for the autofocus to work.
FlashBest results can be found in the shade by using the flash as a fill in. Keep the camera/flash angle around 60 degrees to the water surface so as to avoid the flash light bouncing back into the lens. Koi can get red eye the same as people so it's worth trying the anti-red eye setting on your camera and if the flash is separate try adjusting this to different angles or speeds. If you take lots of photos in quick succession it's important that the flash will keep up and not spend ages recharging.
Take Lots of Shots
Even with the perfect conditions and the best equipment professional photographers still struggle to get the best photos of koi. They improve their chances by taking as many shots as necessary to get the shot they were after. The very nature of koi constantly active and swimming around makes timing crucial. A fast camera response time can be helpful and camera settings and speeds can be adjusted depending on what type of shots you are after. Some time delay shots look stunning but most people want clear detailed images so faster exposure times can be helpful such as sport settings on some cameras.
The best photos are by people that understand koi and being able to predict their behavior helps them make the most of the best photo opportunities. Bigger koi are slower and bolder than young koi that are skittish and difficult to follow but in either case it's best to avoid chasing them round a pond. A camera set to take rapid repeat shots can be helpful but often a combination of patience and luck works best.
Photo Angle for Koi Portraits
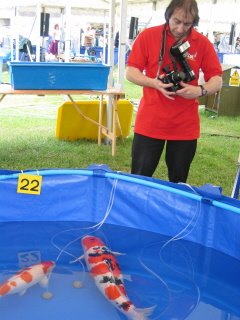
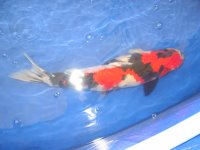
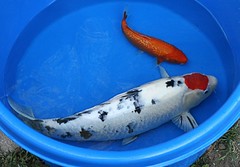
Taking portrait shots in a pond is very difficult so its easier to restrict their swimming space by putting them in a bowl. Traditionally koi have for along time now been photographed in blue bowls which provide the perfect contrast to the koi and help bring out their colours in the picture. Rectangular bowls or floating baskets have proved best because in circular bowls koi tend to swim around the sides. Make the water depth to within 2-3 inches above the koi and switch off air pumps so water movement isn't as obvious. It's always best to get someone to help you so you can keep your hands dry and take care not to drop the camera in the pond!

The perfect koi portrait is taken from head on with the koi in the middle of the shot and not hugging the sides of the bowl. The pectoral fins are outstretched and stationary, not trying to back paddle out of the shot. The angle of the shot should be taken so that it's not too low so all you see is a big head, nor too high catching the reflections. Zooming in helps frame the subject but make sure the whole koi fits into the picture from nose to tail.
By being around koi and taking lots of shots you should be able to take some great photos of koi, even if they don't all come out well. I have found the more I take the luckier I get!
koi photography



 A camera can be automatic or manual focus but when automatic if possible set it so the target point is in focus because reflections on the water can play tricks with some cameras. Automatic or manual it is critical to hold the camera steady while squeezing the shutter release. Autofocus systems can work very well most of the time but when close up on the curved surface of a brightly coloured koi they can become totally confused and produce a fuzzy picture. To avoid this when taking a koi portrait aim the camera at the lead edge of the dorsal fin or an eye as these give the contrast needed for the autofocus to work.


